When it comes to beating the summer heat or improving indoor air circulation, nothing quite compares to a well-installed fan. Whether you’re looking to install a ceiling fan, a wall-mounted fan, or even a portable floor fan, getting it done right is essential for optimal performance and maximum comfort. In this comprehensive guide, we’ll walk you through the step-by-step process of fan installation, ensuring that you can stay cool and breathe easy all year round. So let’s get started and make your home a haven of refreshing air!
- Assessing Your Needs:
Before diving into the installation process, it’s important to assess your needs and choose the right fan for your space. Consider factors such as the room size, ceiling height, mounting options, noise levels, and energy efficiency. Whether you’re looking for a fan for your bedroom, living room, kitchen, or outdoor patio, there are various types and models available to suit your specific requirements. - Gathering the Right Tools:
To ensure a smooth and hassle-free installation process, gather all the necessary tools beforehand. The basic tools you’ll need include a ladder, screwdriver, pliers, wire strippers, voltage tester, stud finder (for ceiling fans), and a tape measure. Having these tools readily available will save you time and frustration during the installation. - Preparing the Installation Site:
Preparing the installation site is crucial for a successful fan installation. For ceiling fans, you’ll need to locate the electrical box in the ceiling and ensure it is sturdy enough to support the fan’s weight. Clear the area around the fan and remove any obstacles that may interfere with its operation. If you’re installing a wall-mounted or floor fan, make sure there is sufficient space and appropriate electrical outlets nearby. - Electrical Safety Precautions:
Before starting any electrical work, it’s vital to prioritize safety. Switch off the power at the circuit breaker to the room where you’ll be working. Use a voltage tester to double-check that the power is indeed turned off before proceeding. If you’re unsure about any electrical aspects, it’s always wise to consult a professional electrician to ensure a safe installation. - Ceiling Fan Installation:
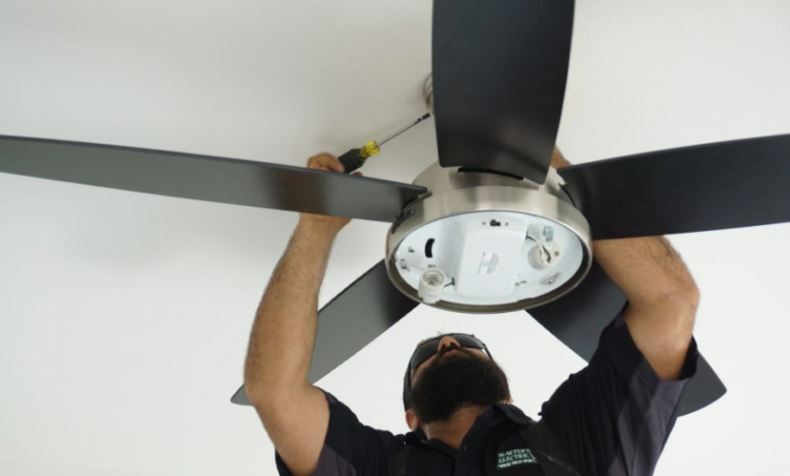
a. Mounting the Fan: Begin by assembling the fan according to the manufacturer’s instructions. Use a stud finder to locate a ceiling joist to secure the fan’s mounting bracket. Mark the locations for the mounting screws and pre-drill holes if necessary. Secure the mounting bracket using screws and attach the fan motor to it.
b. Wiring the Fan: Carefully thread the fan wires through the downrod and connect them to the corresponding wires in the electrical box. Use wire connectors to secure the connections and ensure a tight fit. Neatly tuck the wires into the electrical box and attach the canopy to cover the wiring.
c. Attaching Fan Blades: Align the fan blades according to the manufacturer’s instructions and attach them securely to the motor. Ensure that the blades are balanced and free from any obstructions.
- Wall-Mounted Fan Installation: a. Mounting the Fan: Choose an appropriate location on the wall for your fan. Use a stud finder to locate a wall stud to secure the fan’s mounting bracket. Mark the positions for the mounting screws and pre-drill holes if needed. Secure the mounting bracket using screws and attach the fan unit to it.
b. Wiring the Fan: Turn off the power at the circuit breaker and remove the electrical box cover. Connect the fan wires to the corresponding wires in the electrical box, making sure to match the colors correctly. Secure the connections with wire connectors and reattach the electrical box cover.
c. Testing and Adjustments: Once the fan is securely mounted and wired, turn on the power and test the fan’s functionality. Ensure that all the settings, such as speed and oscillation, are working correctly. Make any necessary adjustments to the fan’s positioning or angle to optimize airflow and achieve the desired cooling effect in the room.
- Portable Floor Fan Installation: a. Placement and Positioning: Choose the ideal location for your floor fan, considering factors such as airflow direction, proximity to electrical outlets, and stability. Place the fan on a flat and level surface, ensuring it is stable and won’t tip over easily.
b. Power Connection: Plug the fan into a nearby electrical outlet. If you’re using an extension cord, make sure it is in good condition and properly rated for the fan’s power requirements.
c. Fan Operation: Once the fan is connected to the power source, adjust the settings such as speed and oscillation according to your preference. Position the fan to direct the airflow where you need it the most, whether it’s towards your body or to circulate air throughout the room.
- Safety Tips: a. Secure and Sturdy Mounting: Ensure that the fan is securely mounted to avoid any accidents or damage caused by loose or unstable installations.
b. Regular Maintenance: Clean your fans regularly to prevent dust buildup, which can affect performance and air quality. Follow the manufacturer’s instructions for cleaning and maintenance, and always unplug the fan before cleaning.
c. Child Safety: If you have children or pets in your home, consider installing fan guards or choosing fans with built-in safety features to prevent accidental contact with moving parts.
Conclusion: Installing a fan in your home is an excellent way to beat the heat and improve indoor air circulation. By following the step-by-step instructions outlined in this guide, you can ensure a successful fan installation that will keep you cool and comfortable throughout the year. Remember to prioritize safety, gather the right tools, and carefully follow the manufacturer’s instructions for your specific fan model. So, get ready to enjoy the refreshing breeze and create a more comfortable living environment with your newly installed fan. Or you can hire Puchong Electrician Services Stay cool and breathe easy!